
Thursday, January 21, 2016
How to change the background color of binder in Scrivener Windows?

How to Use Scratch Pad Panel in Scrivener Windows?
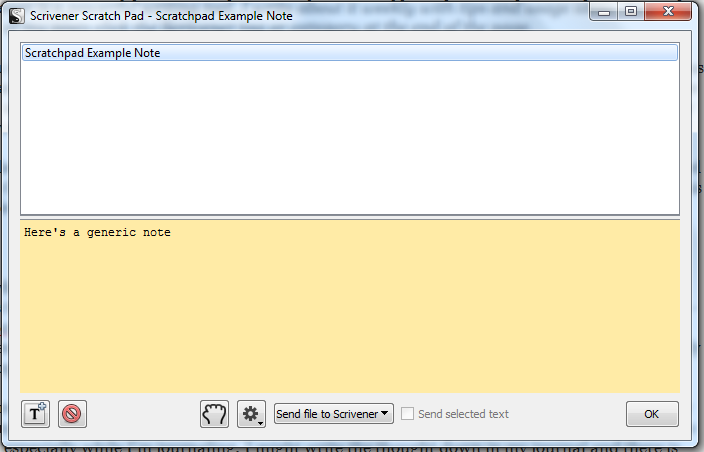
Hi from Turkey again, today we continue to the tutorials of novel writing software scrivener windows. The title of this tutorial will be How to use Scratch Pad panel in Scrivener Windows. I think this tutorial will too much help to the authors who writes books, scenarios and novels. This feature of Scrivener Windows software provide us to write freely from the main draft of our manuscript. With scratch pad you can create pages, no connection with the binder of your project, then you can append this pages to your binder in the way you wish. If you want, you can use scratch pad as the second binder of your project. Let’s see how?
Tuesday, January 19, 2016
How to change the font size of synopsis in Scrivener Windows?

Hi friends, last day a scrivener user asked that how two change the font size of the synopsis panels in corkboard of Scrivener Windows. The default settings of the program use the small fonts so this constitutes some problem for reading the synopsis by the user however you can change the size of the fonts or even you can change the fonts. Lets see.
Monday, January 18, 2016
How to change the background color of editor in Scrivener?

Dear Friends, nice to see you again, today I intended to talk about how we can change the background of the editor in scrivener program. As you know sometimes we are getting bored with seeing the white color on our writing editor in scrivener. How we can do that, let’s see.
Sunday, January 17, 2016
How to Work with Collections in Scrivener?
Hi everybody, in this tutorial we will learn how to work with the collections at the binder area of the scrivener. When we write a novel or other kind of stuff which we predict it takes a lot of pages, we definitely have to constitute drafts collections in a specif periods. Scrivener has a feature which allow us to separate drafts of our project.
Saturday, January 16, 2016
How to delete files temporally and permanently from Scrivener?

Hi friends, as I observed that the many friends have some difficulty deleting the files from the scrivener binder. Today I try to focus on this subject and clarify the situation with a simple tutorial. The style of deleting file from scrivener sometimes can be more serious dilemma, especially the for ones who started to learn this program newly. It is not quite simple unless you learn the way out. Let’s see how.
Thursday, January 14, 2016
How to read Pdf or Other Files during Writing in Scrivener?

Hi everybody, with this tutorial you will learn how you can read pdf files or other kind of stuff such as Ms word files read during your writing process. The previous tutorial showed us how to divide the main scene of the scrivener. We will use this feature for reading different files in the time writing something. In adddition learning this feature you will also learn how to add files to the pages. Let’s see.
How to Divide Scene into Frames in Scrivener?

Dear friends, nice to be here again, today I am going to talk about how we can divide main screen of scrivener during the our writing process. Reading and taking notes when you are reading are very important part of a producing something. In addition to that the comparing pages in the same window is also important. For these reasons we have to have dividable screen, in scrivener this kind of opportunity is available and divide the scene is very simple, let’s see how it can be done.
Wednesday, January 13, 2016
How to Utilize from Snapshot Panel in Scrivener?
 Hi everybody, at the end of this scrivener lesson you will have learned how to utilize from the snapshots panel in scrivener. As everybody knows that sometimes it is very important to take the copy of our text in order to see or compare the past and present situation of our writing draft. The Scrivener makes this very easy for us. The snapshot panel allows us take many snapshots of our manuscript as we want, here it is.
How to Resize Synopsis Panels in Corkbaord?

Tuesday, January 12, 2016
How to Use Progressbar in Scrivener?
Hi for everyone. Today we are continuing to learn scrivener’s features. In this tutorial I am going to show you how you can watch the progress of your text after giving a count aim. I mean I made page and in this page I aim to reach for nearly 300 words. There is a progress bar in scrivener to observe the level of the page according to aimed word count for every page. Let me show you.
Monday, January 11, 2016
How to Open Corkboard in Scrivener?

Greetings from Turkey, I hope your Scrivener learning process is going well. Today we will learn how to show the synopsis in corkboard in Scrivener. The cardboard panel in scrivener is very useful. If we decide to take a look at the writing process of our manuscript we can open the corkboard and look at to the synopsis panels which every synopsis panel belong to only one page of the project. Let me show you.
Sunday, January 10, 2016
How Resize Synopsis Panel and Add Image into it in Scrivener?
We continue learn the other features of Synopsis part of the Scrivener writing program. Today’s tutorial will be about the changing the size of Synopsis area and how to add picture into it? When you write your text in scrivener you can easily take note in synopsis area. What is more, when you read something in scrivener (by the way scrivener is not a writing program but also it is a program you can take note when you read something in different window in scrivener.)you can get notes to synopsis area as well. Let me show you, but at first I would like to showing you how you can resize the synopsis panel according to your using style of the program.
Open Synopsis in Scrivener.

Hi everybody, in this tutorial I am going to teach you how you can use Synopsis feature of scrivener. As everybody knows when we write something else we always think or look around for somewhat which remind us something to be inspired to continue writing process. That can be a picture or a note or what can else be. Synopsis part of the scrivener program is used for this intend.
Subscribe to:
Posts (Atom)
